


I love to have a crochet or needlepoint project in the works
When I started seeing fingerless gloves all over the place I couldn’t wait to try making them!


I made a pair for DD and CC for Christmas

These are great because they keep your hands warm
but your fingers are available for tying, buttoning, writing, texting


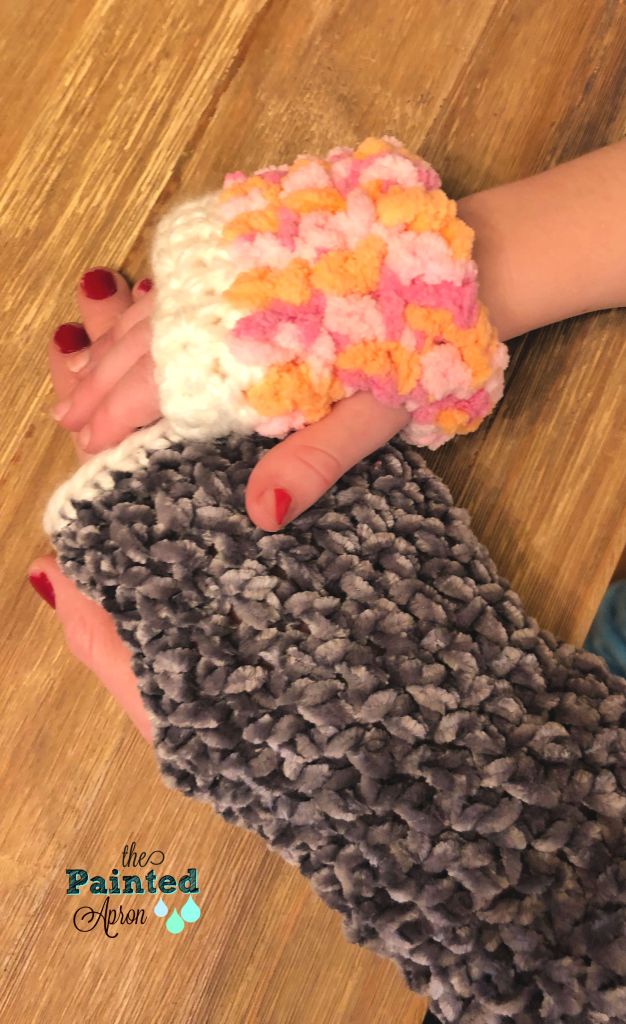
I made an experimental pair first, using Julie’s pattern,
making a rectangle and sewing the sides together
I used a chunky white yarn and a large crochet hook
I trimmed them with a gray and white yarn I had leftover from a blanket


I decided to use a tube pattern for DD’s and CC’s
I used Bernat Velvet yarn in Vapor Gray available here


These are soooo soft!
DD doesn’t like a lot of fussy things so I just finished them with a simple white edge at the top


There are so many wonderful free patterns and tutorials on Pinterest and You Tube
You can make gloves in a simple rectangle and sew the edges together like Julie did here
Or crochet them in a tube like the tutorial I used here
Crochet Fingerless Gloves
NOTE: the size/type of yarn and crochet hook will vary the number of stitches and rows needed so adjust these directions accordingly
washable yarn
crochet hook
Measure wrist diameter. Measure length from fingers to wrist or mid arm.
Ch a length to match diameter of wrist. After the last stitch in the row, form a circle by putting the first ch on your hook yo, and pull the first chain through last chain.
Ch 1 then sc in each chain in circle. When you have done the last stitch in the row, put your hook through the first stitch, yo and pull through the last stitch forming a circle.
For the 2nd row, ch 2, then dc in each stitch around the tube until you’re back to the first stitch of this row, put your hook through the first stitch, yo and pull through the last stitch continuing the circle. Continue rows of dc in this fashion, completing each row by putting your hook through the first stitch, yo, and pulling through the last to join the circle. Ch 2 to start the next row, and continue rows until desired length to bottom of thumb is reached.
To make thumb hole, when you get near the end of the last row before thumb hole, skip the last 3-4 stitches and do 3-4 chain stitches instead, then complete the circle as you have been doing by putting your hook through the top of the first stitch, yo and pull through the last stitch, and ch 2 and start another row of dc
When you get to the end of the row, and the 3-4 chains, simply dc in each one and join the circle as before. Do another 1 or 2 rows of dc, depending on how much glove you want above the thumb hole. Finish with one last row of sc, finish off and weave in any loose ends.
Legend:
ch = chain
sc = single crochet
dc = double crochet
yo = yarn over


I used the blue crochet hook, size K/1012 6.50MM for the gray gloves
I used the larger plastic hook for the bulky white gloves
The size of yarn and hook will affect the number of stitches
and the stitch you choose to use will determine the number of rows needed

Once you get the hang of it, they work up very quickly!


for another printable version of this pattern click here
🧶✂️🎁
I will be joining these fabulous parties and blogs:
Meal Plan Monday Love Your Creativity What’s for Dinner?
Between Naps on the Porch, Make it Pretty Monday
Turn About Tuesday Celebrate Your Story, You’re the Star
All About Home/ Common Ground Follow the Yellow Brick Home
Tasty Tuesday Oh My Heartsie Girl Full Plate Thursday
Thursday Favorite Things Creatively Crafty Home Matters